This is the fifth in my ‘Photography 101’ series, aimed at helping people feel more confident with their camera. Ideally you’ll have read all of the others before now. For best results, follow the ‘Homework assignments’ and try the exercises. You’ll get to know your camera a lot quicker if you do. Today, we start breaking the rules you’ve just worked so hard to learn!
Let there be light
Your first requirement is a strong light source. It needs to be powerful, even, and the bigger the better – you won’t get quite the same effect from a torch, no matter how powerful it is. That’s why a wide window works wonders (especially alliteratively). Your subject is positioned in front of the light source (you can experiment to find out how close – touching will be too close, but they’ll need to be relatively close). Then, the camera is at the other end of the straight line from light source to subject.
This straight-line placement is one of the two key factors to producing the image above. After you’ve created your own high key image (oops, homework spoiler) then you can experiment with the effect produced by different angles.
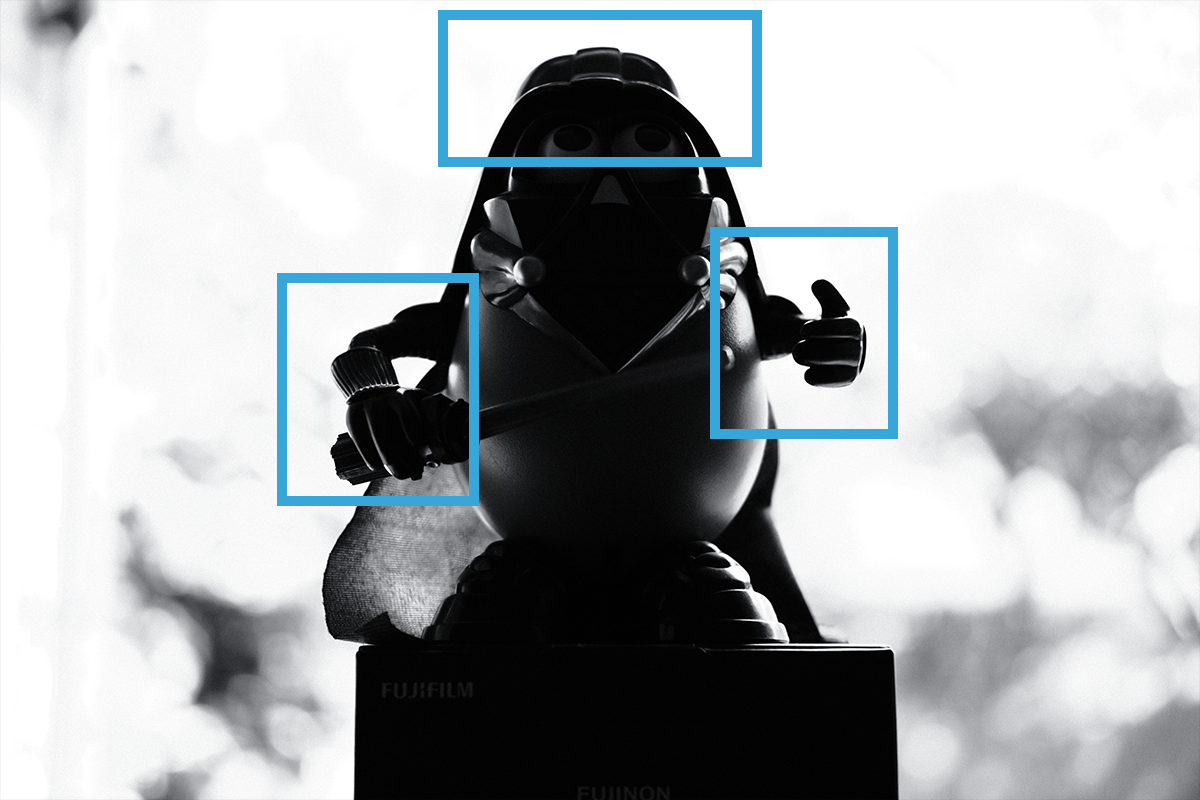
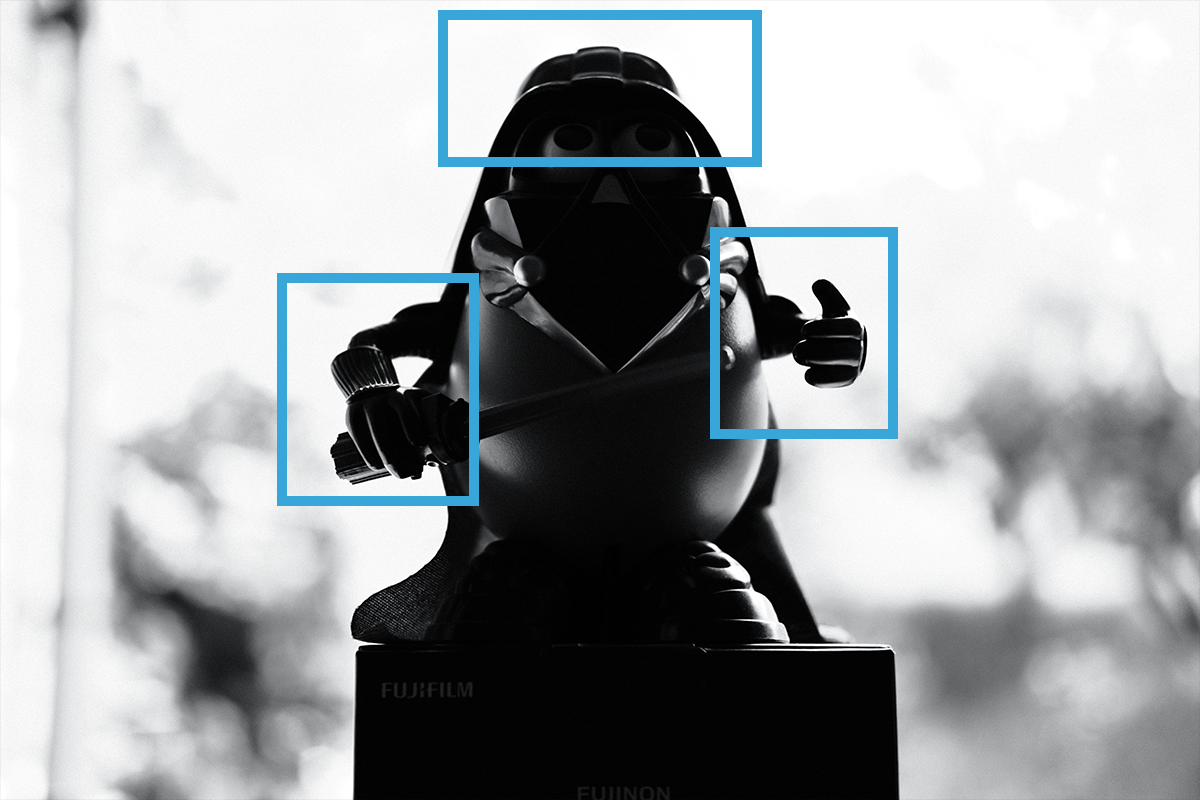
The other key factor is the amount of over-exposure in your image. We produce that effect by decreasing the shutter speed way past the point of correct exposure. To illustrate that, let’s look at a disturbing series of photos featuring the UK’s next top model, Darth Tater.
I find your lack of exposure disturbing
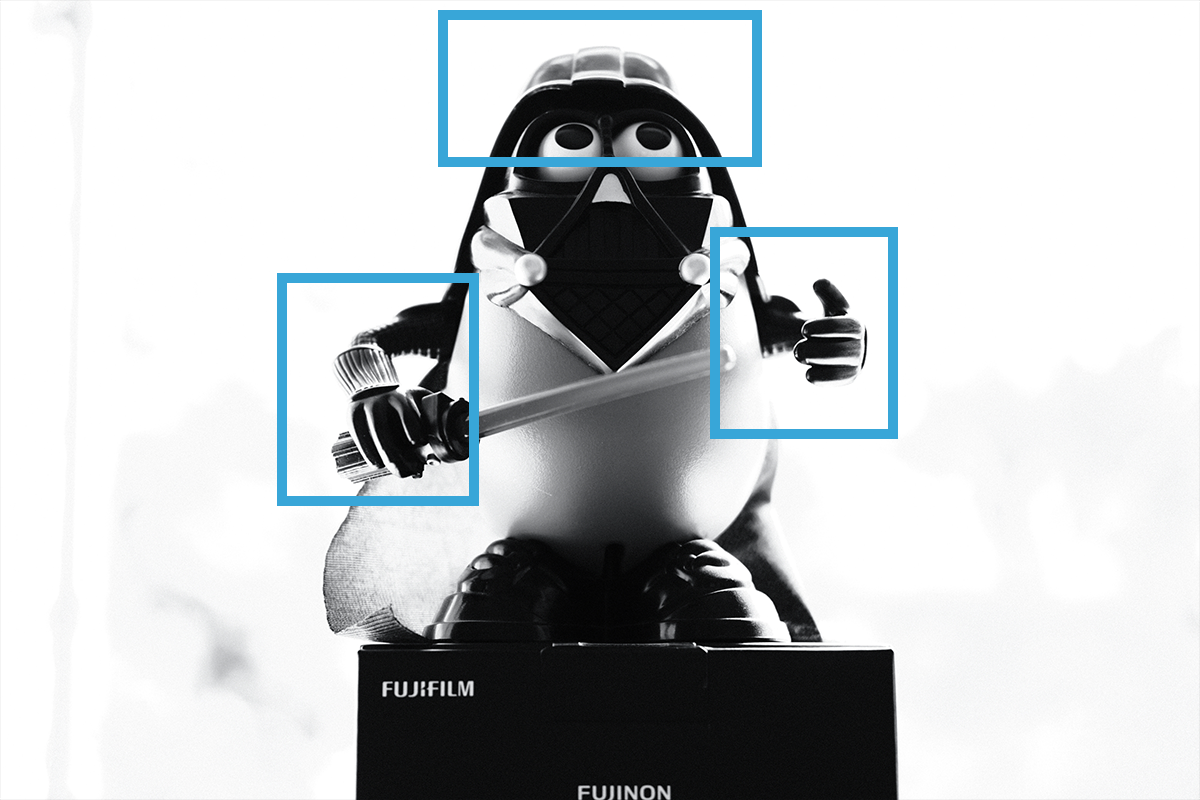
I had three options here. I could have modelled myself, but I’m sure you’re all sick of my thirst traps by now. I could have used The Cat, but as anyone who has a cat will know, they’re not really sentient beings; more the corporeal manifestation of the spirit of mischief, so that ruled Smol Cat out. I hunted round the house and finally settled on Darth Tater.
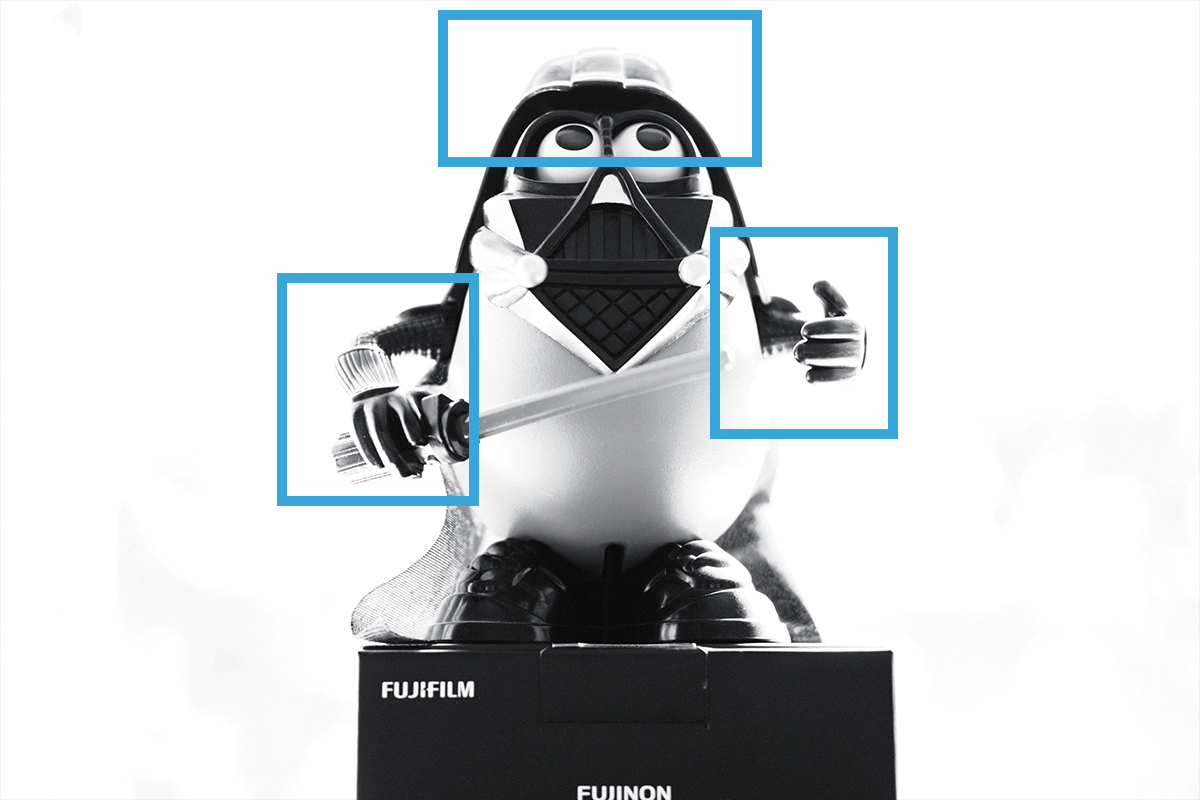
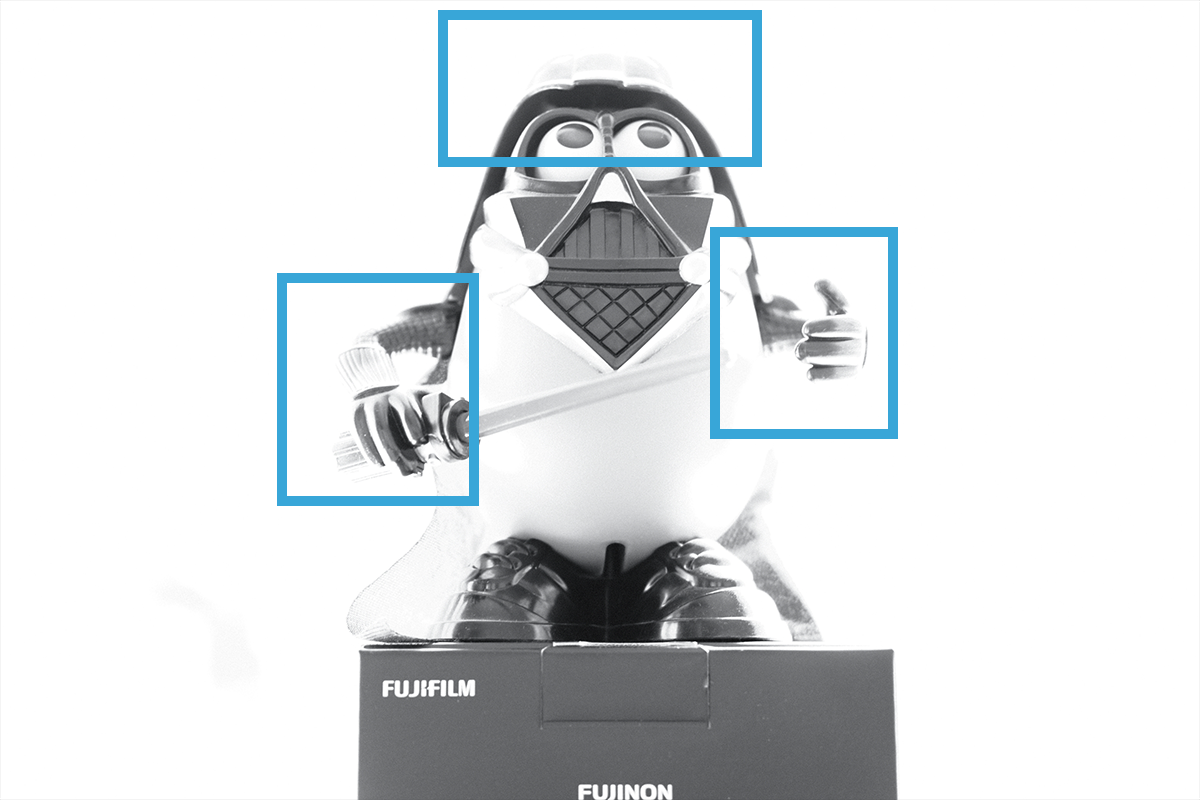
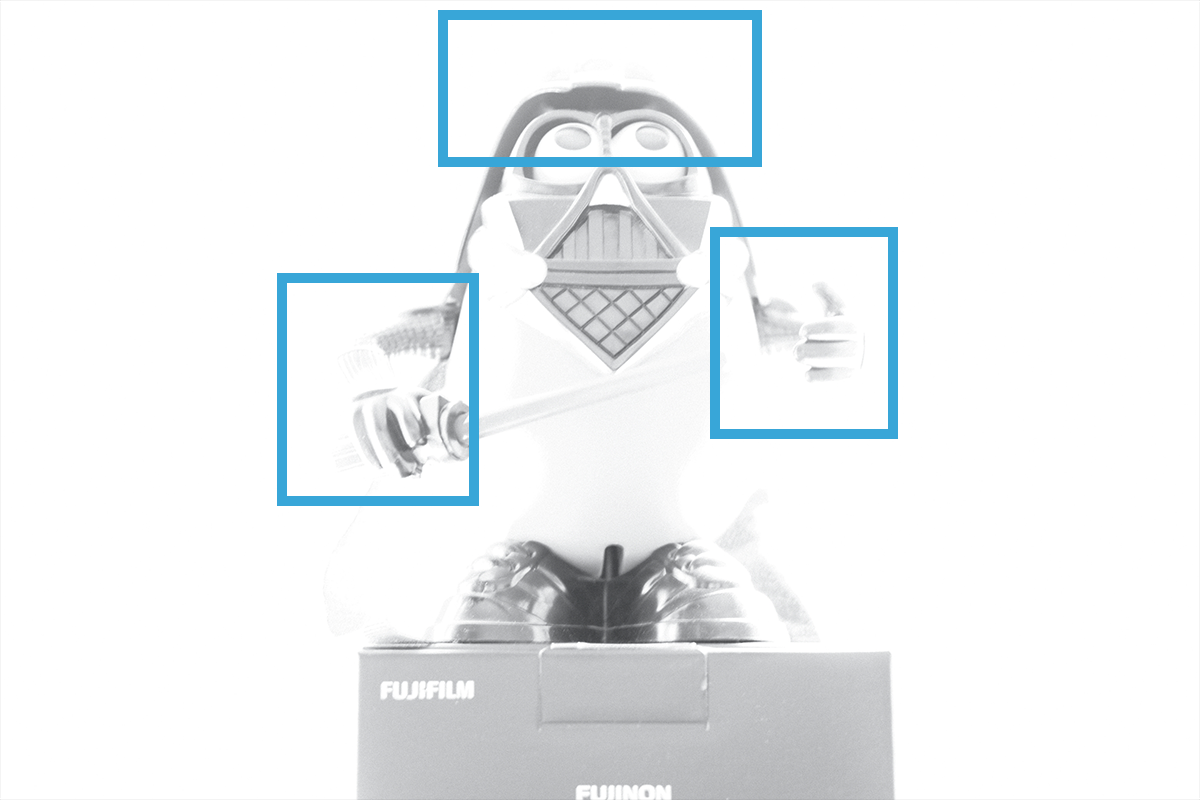
Darth Tater turned out to be the perfect model because of his huge, shiny helmet. There, you can do what you want with that double entendre. The important thing as you look at this series of images is to pay attention in particular to the areas marked in the blue boxes. Watch how the light behaves as we increase the exposure/decrease the shutter speed. For all these images, the aperture is F2 (because we want to blur out the background as quickly as possible) and the ISO is 200. They remain the same and we only change the shutter speed. Also, you don’t have to do it in black and white, I just don’t take colour pictures because I’m very pretentious.


Get it right in camera
This is our motto now and always: ‘get it right in camera‘. If you take that picture above at either of the last two settings, you can’t fix it in Photoshop or another app*; the camera simply hasn’t recorded enough detail for you to salvage. 1/15th of a second here gives us a good, strong image, with plenty of areas of contrast, but that pleasing high key effect.
* If you shoot in RAW – to be discussed later, maybe, I don’t know yet, I haven’t decided – this is not quite true and the camera will actually record more information than you see on screen. Let’s assume you’re shooting in JPG for now.
Homework assignment
Go forth and shoot thine own high key image. I suggest you find a big window and follow the same process. You can do it naked if you like but please bear in mind your local decency laws. I suggest starting with:
- F2, or whatever your widest aperture is
- ISO 100 or ISO 200, whatever your camera’s best quality setting is
- And then choose a shutter speed for yourself – start dark (so a fast shutter) and work backwards
- Net curtains
Quick snaps
- High key photography is when we intentionally overexpose our image
- For the basic effect, get the light source, subject and camera in a straight line
- Keep an eye on your exposure – you’ll quickly go from ‘pleasing’ to ‘beyond salvage’